Home Exterior Insulation Guide: Energy Savings & Building Science
A Comprehensive Guide to Exterior Home Insulation
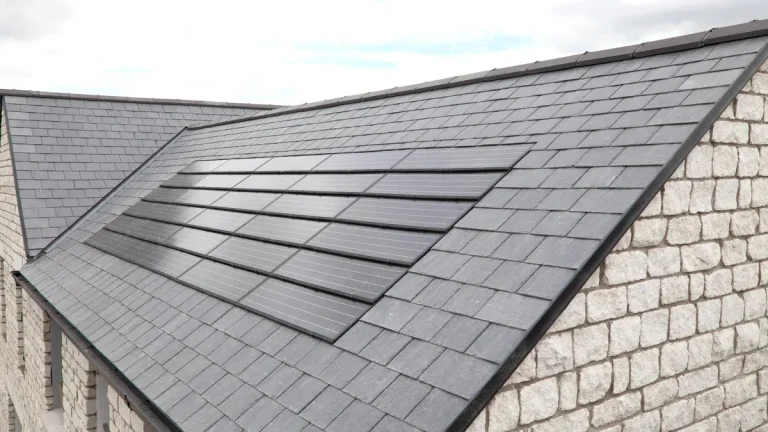
Home exterior insulation involves the application of insulating materials to the outer shell of a building to enhance its thermal performance. Unlike interior insulation, which is placed between wall studs, exterior systems wrap the entire structure in a continuous layer of protection. This approach is fundamental to modern building science, as it addresses the “building envelope”—the barrier between the conditioned indoor environment and the unconditioned outdoor elements.
This guide provides a neutral, educational analysis of home exterior insulation for energy savings. Readers will learn about the different types of rigid foam and mineral wool boards, the mechanical process of installation, and the long-term logistical benefits of reducing thermal bridging. By understanding how these materials interact with moisture barriers and siding, property owners can make informed decisions to improve the efficiency and durability of their structures.
Overview of Home Exterior Insulation for Energy Savings
The primary concept behind home exterior insulation for energy savings is the elimination of “thermal bridging.” In a standard wood-framed wall, heat travels easily through the solid wood studs, which have a much lower R-value (resistance to heat flow) than the fiberglass batts between them. By applying a continuous layer of rigid insulation over the exterior sheathing, the wood studs are “thermally broken” from the outside air, significantly increasing the effective R-value of the entire wall assembly.
Property owners typically approach exterior insulation during a major renovation, such as a siding replacement, or during new construction. The goals are generally twofold: to reduce the energy required for heating and cooling and to move the “dew point”—the temperature at which moisture condenses into liquid—outside of the structural wall cavity. A successful outcome results in a more stable indoor temperature, reduced HVAC wear, and a lower risk of structural rot caused by internal condensation.
Key Categories of Exterior Insulation Materials
Exterior insulation is categorized by its material composition and its permeability (how well it allows water vapor to pass through).
| Category / Type | Description | Common Use Case | Time / Cost / Effort Level |
| Expanded Polystyrene (EPS) | “Bead-board” foam; semi-permeable and economical. | Exterior Insulation and Finish Systems (EIFS). | Moderate / Economical |
| Extruded Polystyrene (XPS) | Dense, usually blue or pink foam; high moisture resistance. | Below-grade foundations or very wet climates. | Moderate / Mid-Range |
| Polyisocyanurate (Polyiso) | Foam with a foil or glass face; highest R-value per inch. | Maximum insulation in limited space (standard walls). | High / Premium |
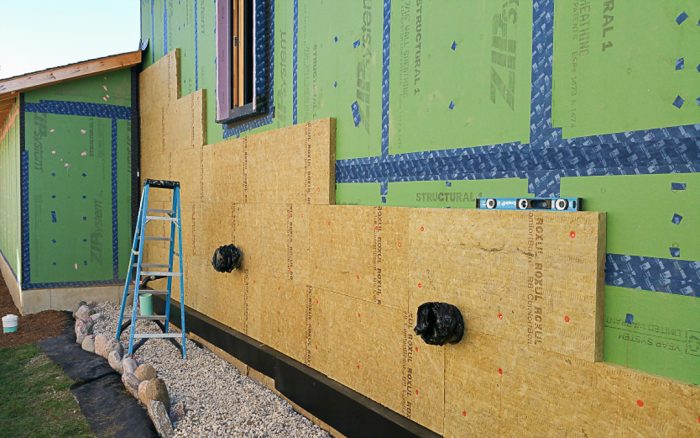
| Mineral Wool (Rigid) | Spun stone and slag; non-combustible and highly breathable. | Fire-prone areas or historic wood-frame homes. | High / Premium |
| Graphite Polystyrene (GPS) | EPS infused with graphite to reflect radiant heat. | High-performance “Passive House” designs. | Moderate / Mid-Range |
Choosing between these materials depends on local climate zones and the existing wall assembly. For example, Polyiso is preferred in cold climates for its high R-value, but it may lose some efficiency in extreme sub-zero temperatures. Mineral wool is selected for its superior fire rating and its ability to allow moisture to dry out toward the exterior, which is critical for older homes without internal vapor barriers.
Practical Scenarios for Insulation Application
Scenario 1: The Siding Retrofit
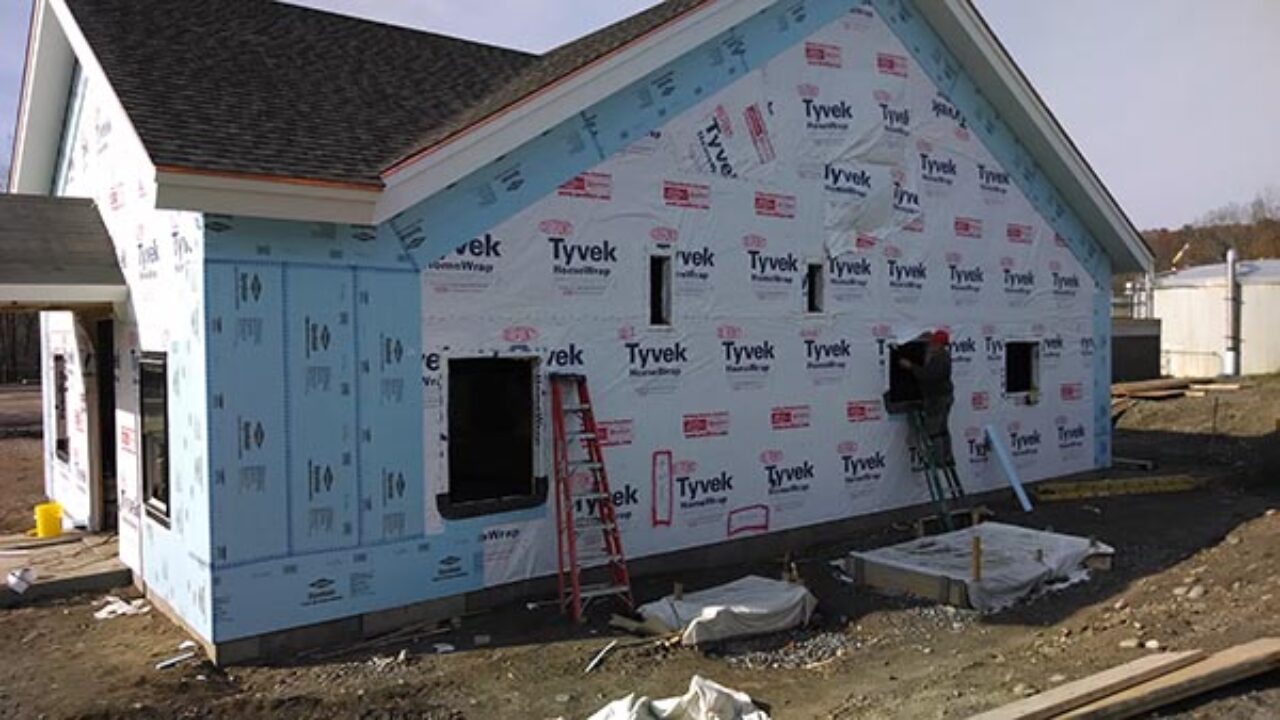
When an existing home’s siding has reached the end of its lifespan, it provides a unique window to add exterior insulation.
-
Components: Removal of old siding, installation of a weather-resistive barrier (WRB), 1-inch rigid foam boards, and new furring strips.
-
Process: The foam is fastened over the house wrap, and vertical wood strips are installed to create a “rain-screen” gap before the new siding is attached.
-
Relevance: This is the most common way to upgrade an older home’s energy profile without disturbing the interior finishes.
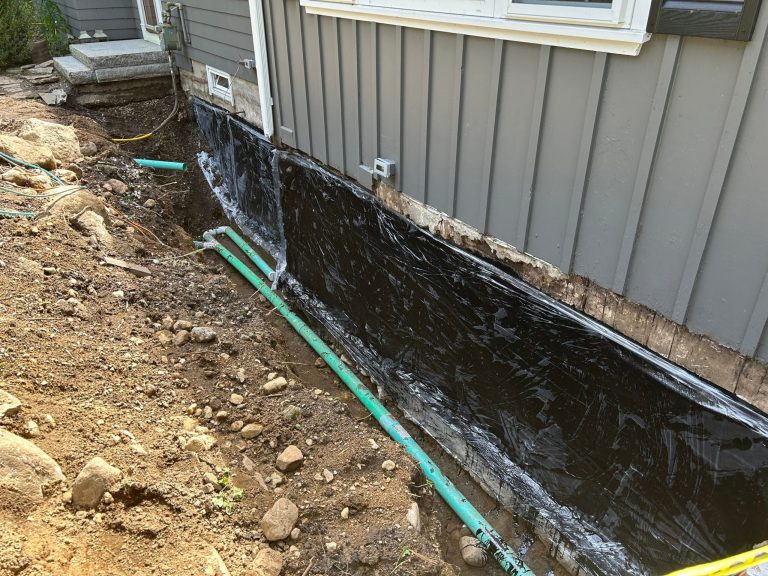
Scenario 2: The Below-Grade Foundation Wrap
Insulating the exterior of a basement or crawlspace wall to prevent the concrete from acting as a giant heat sink.
-
Components: XPS foam boards, specialized masonry adhesive, and a protective “dimple” drainage mat.
-
Process: Excavating the foundation, applying waterproofing, adhering the foam, and protecting the foam from soil pressure.
-
Relevance: Foundation insulation prevents cold basement floors and reduces the risk of musty odors caused by condensation on cold concrete.
Scenario 3: The High-Performance New Build
Constructing a new home to meet “Net Zero” or extreme efficiency standards.
-
Components: 2–4 inches of GPS or Mineral Wool, staggered seams, and specialized long-reach fasteners.
-
Process: The insulation is applied in two layers with offset seams to ensure there are no direct air paths from the exterior to the sheathing.
-
Relevance: This scenario maximizes home exterior insulation for energy savings by integrating the insulation into the initial engineering of the structure.
Comparison: Scenario 1 focuses on convenience and incremental gain; Scenario 2 addresses specific moisture and comfort issues in basements; Scenario 3 is a comprehensive structural strategy. Readers should choose the scenario that matches their current project scale and local energy costs.
Planning, Budgeting, and Resource Considerations
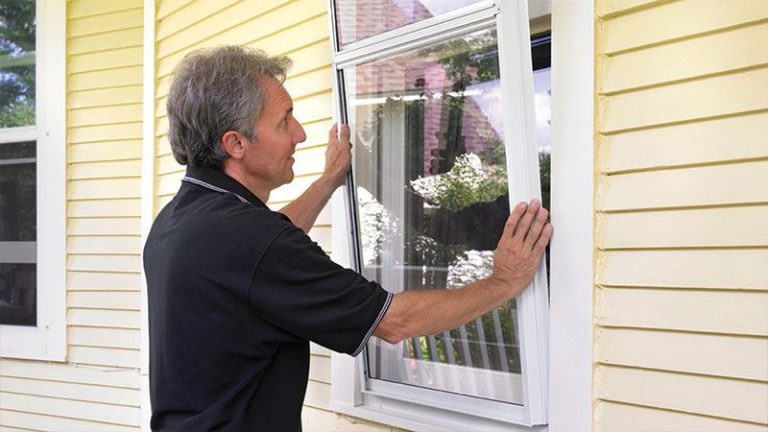
Meticulous planning is required because adding exterior insulation increases the thickness of the walls. This necessitates “extending” window and door frames so they remain flush with the new exterior surface.
| Category | Estimated Amount / Effort | Explanation | Optimization Tips |
| Insulation Material | $1.00 – $2.50 per sq ft | The raw cost of the foam or mineral wool. | Buy in bulk to reduce per-board shipping costs. |
| Furring Strips / Fasteners | $0.50 – $1.00 per sq ft | Specialized long screws and wood/plastic strips. | Use plastic “wind-washers” to prevent foam damage. |
| Labor (Installation) | $2.00 – $5.00 per sq ft | Time spent cutting, fitting, and taping. | Coordinate with a siding crew for a single mobilization. |
| Window/Door Extensions | $100 – $300 per opening | Materials to build out the frames (bucks). | Use rot-resistant PVC for exterior extensions. |
Note: These figures are illustrative examples for 2026 and will vary based on regional labor rates and material thickness.
Strategies, Tools, and Support Options
Successful installation relies on maintaining the continuity of the thermal and moisture barriers.
-
Staggered Seams: If installing multiple layers, the joints of the second layer should never align with the first.
-
Pros: Virtually eliminates air leakage through the insulation layer.
-
Cons: Requires more careful measurement and double the labor.
-
-
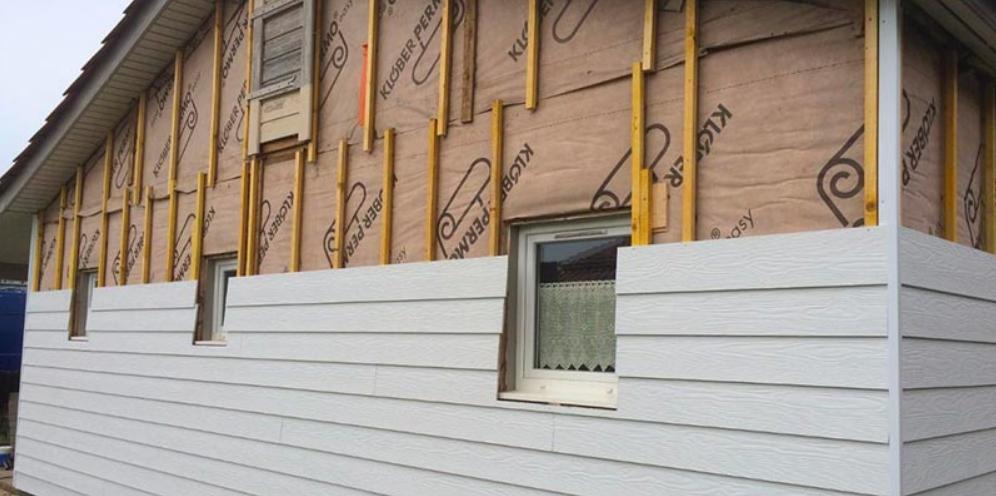
Rain-Screen Furring: Installing thin wood or plastic strips over the insulation.
-
Pros: Creates a drainage path for water; allows siding to dry from both sides.
-
Cons: Adds to the wall thickness and complicates window flashing.
-
-
Specialized Seam Tape: Using high-performance acrylic tapes (not duct tape) on all foam joints.
-
Pros: Creates a secondary air barrier; prevents “wind washing” behind the boards.
-
Cons: Can be expensive; requires a dry, clean surface for adhesion.
-
-
Cap-Nailers/Washers: Tools that distribute the pressure of the nail across a wider plastic disc.
-
Pros: Prevents the fastener from “pulling through” the soft foam in high winds.
-
Cons: Requires a specific pneumatic tool for high-speed installation.
-
Safety, Risks, and Common Challenges
-
Moisture Entrapment: If a high-R-value, non-permeable foam (like Polyiso) is used on a wall that already has an interior vapor barrier, moisture can become trapped in the wood studs. Mitigation: Consult a “hygrothermal” analysis or use breathable mineral wool if you are unsure of the wall’s drying potential.
-
Insects: Termites and ants can tunnel through foam insulation unnoticed. Prevention: Use foam treated with borates and install a “termite shield” (a metal flashing) at the base of the wall.
-
Fire Safety: Many foam insulations are petroleum-based and can contribute to fire spread if not properly covered. Rule: Exterior foam must always be covered by a code-approved thermal barrier, such as fiber-cement siding or brick.
-
Window Flashing: As walls get thicker, standard window flashing techniques may fail. Prevention: Use “sill pans” and integrated flashing tapes to ensure water is directed to the outside of the foam, not behind it.
Maintenance and Long-Term Management
Once covered by siding, exterior insulation requires very little direct maintenance. However, the systems protecting the insulation must be managed.
-
Check the Kick-out Flashing: Ensure water from the roof is not being directed behind the siding and into the insulation layer.
-
Insect Screen Review: Periodically check that the bug screens at the bottom of the rain-screen gap are intact.
-
Siding Sealant: Maintain the caulk around windows and doors; as the wall moves with temperature changes, these seals prevent water from saturating the insulation edges.
-
Rodent Barriers: Ensure the metal trim at the base of the wall remains tight to prevent mice from nesting in the foam.
Documentation and Reporting
Organizing records of an insulation project is essential for realizing the “home value” aspect of the upgrade.
-
Tips for Organization: Keep a digital folder containing the NFRC or manufacturer labels showing the R-value per inch, the specific tape used, and “as-built” photos of the wall before the siding was installed.
-
Example 1: A homeowner uses photos of the “Z-flashing” over the windows to prove to a building inspector that the drainage plane is correct.
-
Example 2: During a home sale, the owner provides an “Energy Upgrade Report” showing the total R-value of the walls, justifying a higher listing price based on reduced utility projections.
Closing Summary
Home exterior insulation for energy savings is a building science strategy that prioritizes comfort and structural longevity. By wrapping a structure in a continuous thermal blanket of foam or mineral wool, property owners can effectively manage heat transfer, eliminate condensation risks, and significantly reduce long-term utility expenditures.